I wanted something that sparkled and stood out amongst the plants
as they start to grow and bloom.
And, because you know me, and my lack of patience, it had to be easy.
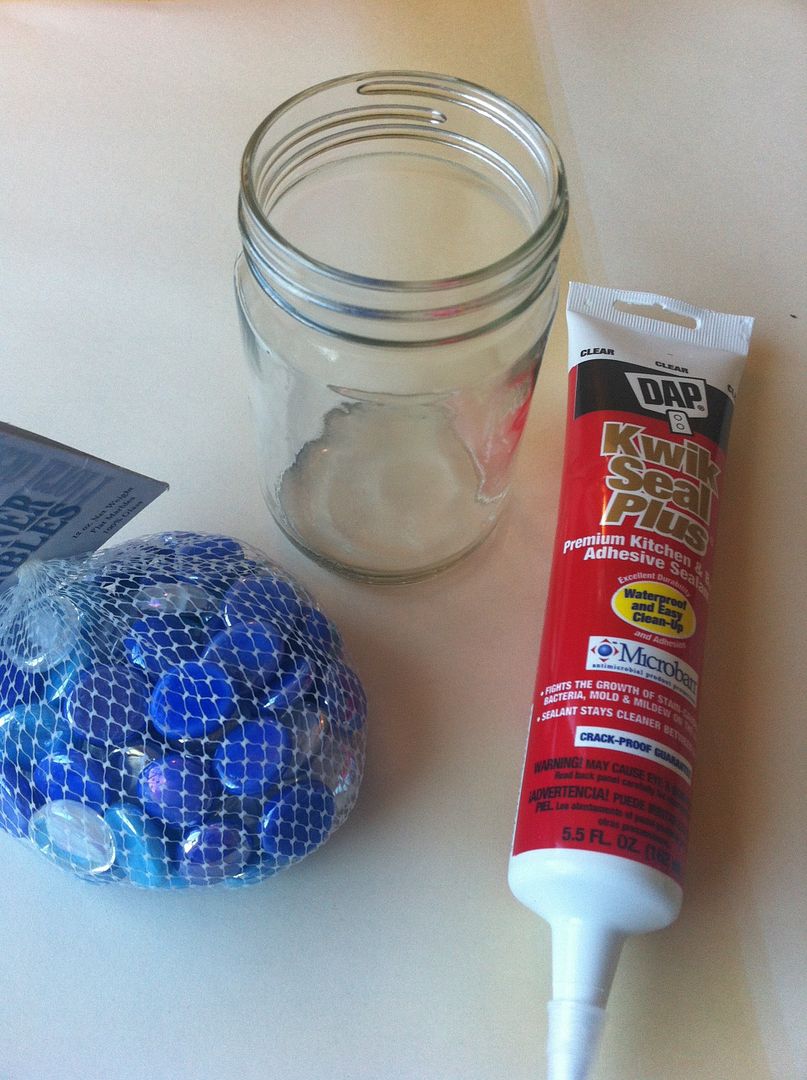
I grabbed an empty jar, some flat sided marbles and some good glue and went to work.
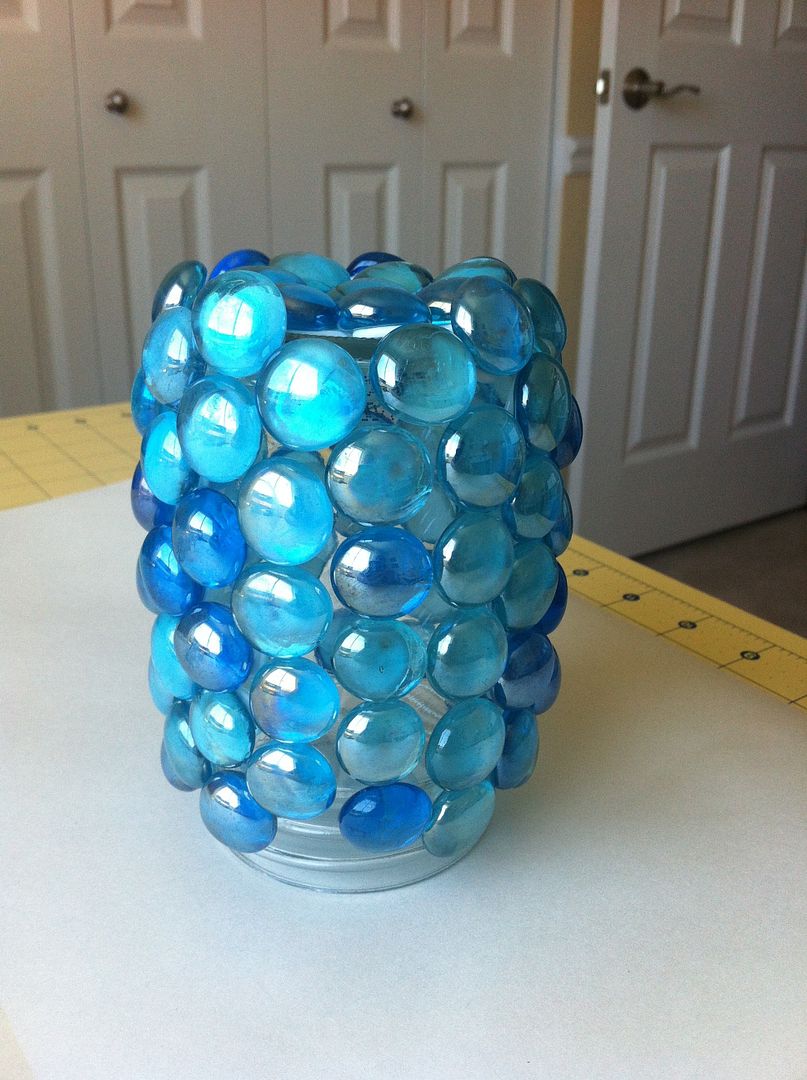
I glued the marbles all over the jar in a random pattern.
I went with blue as blue is a hard color to find in perennial plants.
Plus, it reminds me of cool water and the summer sky.
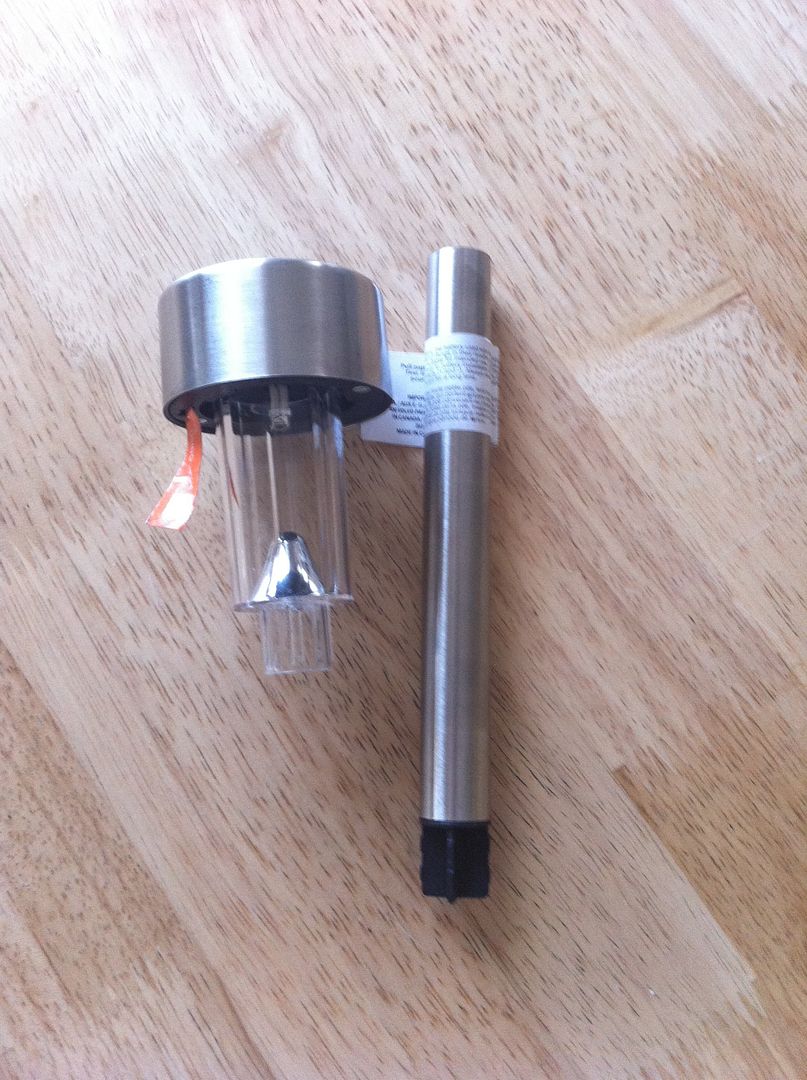
I then took a solar light from the Dollar Tree and took the long pole off.
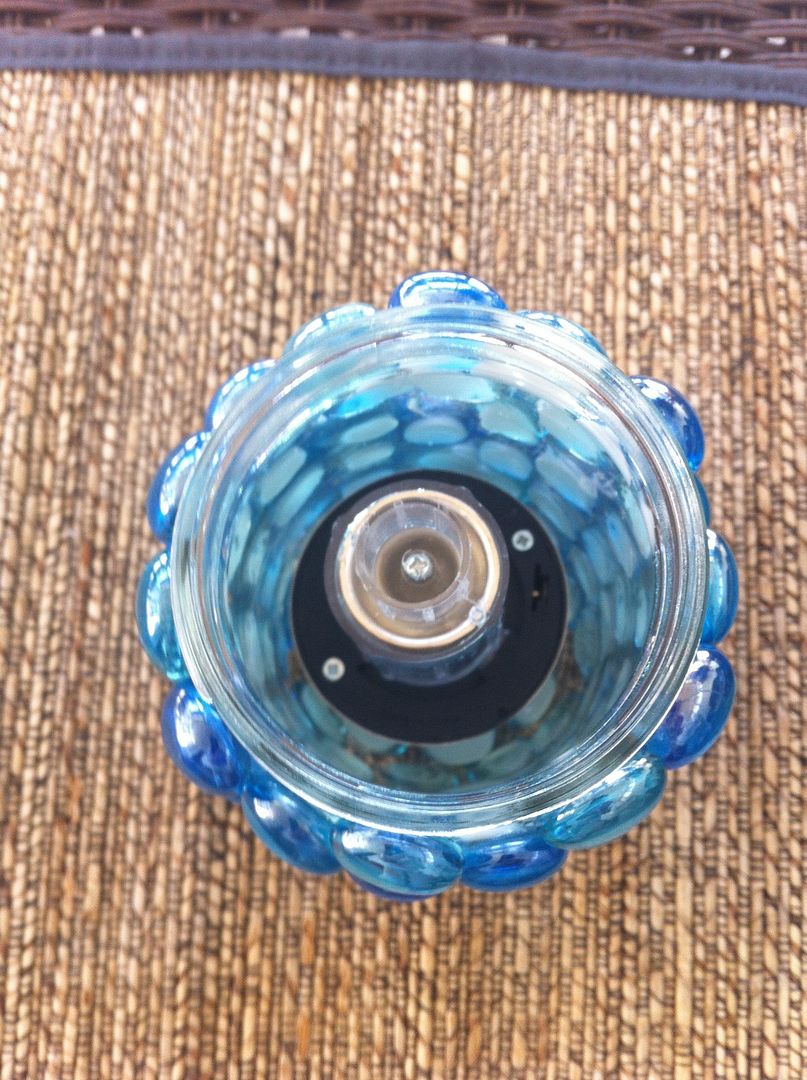
I dropped the light part, solar cell at the bottom, into the jar.
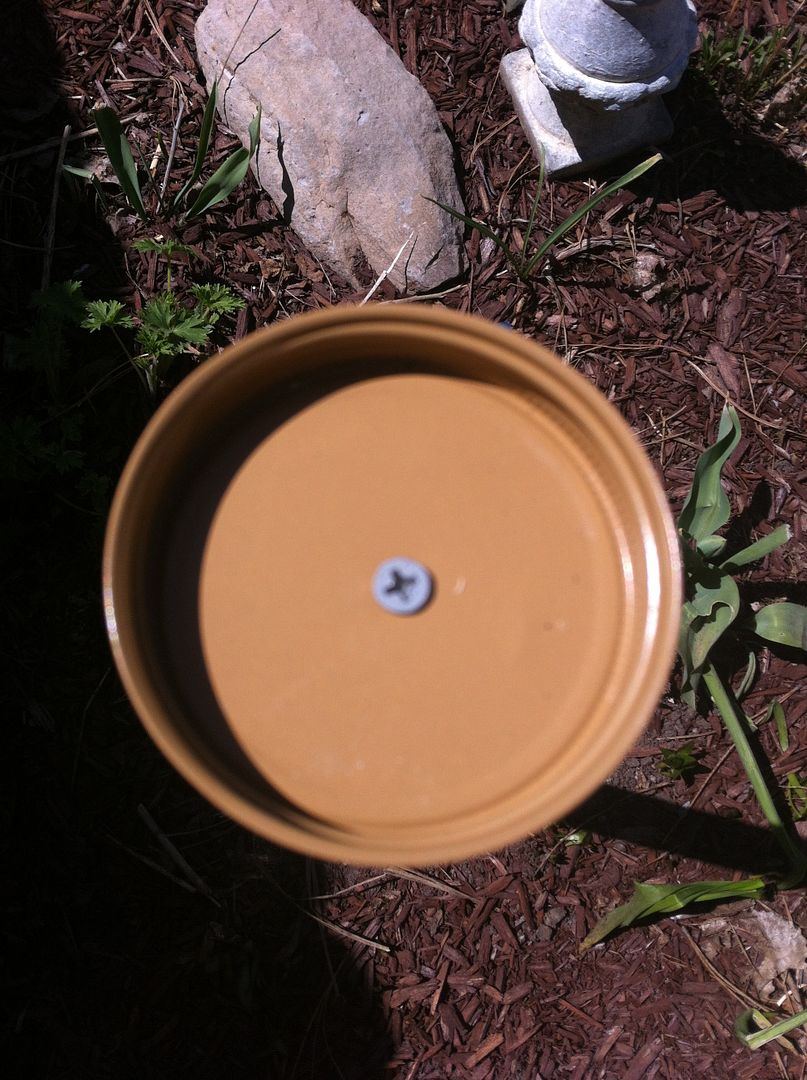
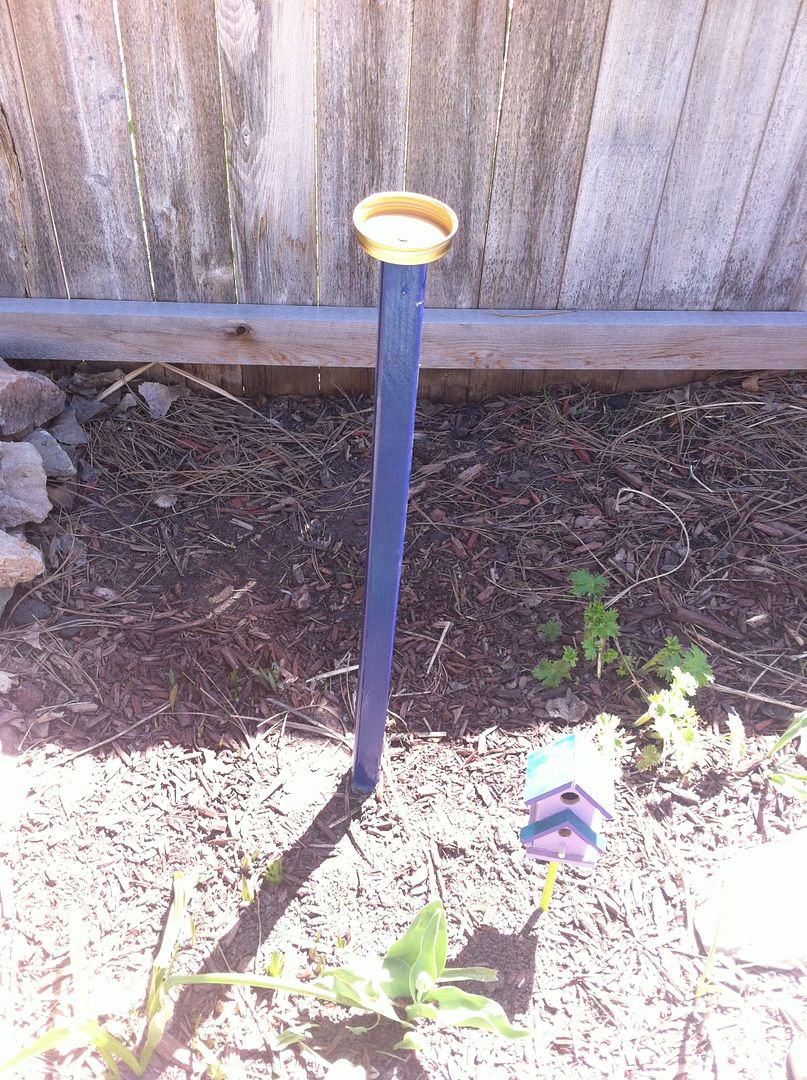
I spray painted a leftover wooden stake a dark blue and screwed the cap of the jar lid into the pole.
(Pretty darn close to center!!)
And then screwed the jar onto the lid.
Not only does it shimmer in the sunlight, it gives off a soft blue glistening glow at night thanks to the solar light inside.
Should the light quit working,
I can simple untwist it and replace the battery in the light.
I will be making another for the other end of the garden.
Click here to see where I may be partying this
week.
AND
AND
Don't
forget to come by on Tuesday's
for the
link party.




Clever Kathe! This is so 'green' and beautifully blue.
ReplyDeleteThis is really pretty :-)
ReplyDeleteCute idea, Kathe! I have so many of those marbles here (and I have lost mine). lol xo
ReplyDeleteVery cute. I love the blue!
ReplyDeleteI love it Kathe. Is it very bright at night?
ReplyDeleteI want to make one of these! Thanks for a great idea!♥♫
ReplyDeleteWhat a great idea to put outdoors. I've tried this with an indoor version but I used hot glue gun to make the pebbles stick. The hot glue gun works so long as you don't move the glass around too much, otherwise it can easily pop off. Now, thanks to you, I know a much better adhesive. Thanks for sharing! You did a great job!
ReplyDeleteBRILLIANT!!!! Pinned!!!
ReplyDeleteWhat a great idea! I need to check the Dollar Tree for some of those lights. I have been wanting some and these are gorgeous! This would be a great way to recycle jars that would normally get thrown away. I love it...:) Thanks so much for sharing!
ReplyDeleteBlessings, Vicky
Life On Willie Mae Lane
This is so pretty! I bet it is lovely in the garden. I love the blue! Wonderful idea!!
ReplyDeletehugs,
Linda
Such a cute idea! I've also been doing some work in my backyard! Would love to make these for my outdoor table!
ReplyDeletexo Sam
DIY Huntress
Good job! I Like that...it's very inspiring!
ReplyDeleteI would love a soft glow out in the garden. Love that color blue.
ReplyDeleteThis would be a great gift for my mom - except I could use some of the beach glass that I've collected over the years. My mother loves to visit the ocean and she loves to garden! Thank you for sharing such a great idea!
ReplyDeleteWhat a cute idea!
ReplyDeleteVery nice. I would love to see this lit up at night!
ReplyDeleteThis is fabulous! I would to have you link it up with me, on Wednesday and now in my Pantry, a Mason jar project linky. (button on my side bar) Hope to see you there! Pinned it :) Family Home & Life
ReplyDeleteI love this idea--it's a great way to add a little color to the yard! We're going to do a major re-do of our backyard and I think this is going to be one of the ideas we'll try! I'm stopping by from Frugal Crafty Home Blog Hop--thanks for linking up!
ReplyDeleteThat is such a great idea! Love it!!
ReplyDeleteHow clever. Love this idea. Thanks tons for joining Inspire Me. Hugs, Marty
ReplyDeleteSimple and pretty! :)
ReplyDeleteThanks for joining the Link Up this week!
Very pretty - I love the glass stones, they add so much color to your garden! Thanks for sharing at Fluster's Creative Muster Party!
ReplyDeleteRobin
Fluster Buster
Hey, that looks great, and it doesn't look too terribly difficult to do. Hope you have a great day!
ReplyDeleteHeidi’s Wanderings
Very cute! Thanks for sharing at Give Me the Goods Monday link party!
ReplyDeletehttp://www.marriedfiling-jointly.com/
That will be so pretty in your garden, day and night. Inspiring. Lynaea @ EveryDayBloom.com
ReplyDeleteKathe, I just LOVE this!!! I am so making this for my garden. Thank you so much for sharing such a beautiful and great project and have a happy Wednesday! ~Cindy@litlemisscelebration.com
ReplyDeleteWhat a creative decoration! I love it!! Stopping by from T2T. Roz / www.littlerandr.org
ReplyDeleteI love the way that turned out!! I love the blue.. Thanks for linking up to Tasteful Tuesdays! Emily @ Nap-Time Creations
ReplyDeleteLove it!
ReplyDeleteSam
Im definitely making a few of these this weekend. One question though, do you just drop the light in or are you glueing it to the bottom of the jar?
ReplyDeleteI just drop the light in the jar, making sure the solar cell side goes in first. No glue.
DeleteThat's a great idea! Might have to make myself a couple of those.
ReplyDeleteSo smart! I love it!
ReplyDeleteI'm gonna have to make one of these...love it! Hugs, Penny
ReplyDeleteSo pretty! I love the way the blue sparkles in the garden.
ReplyDeleteWhat a smart woman you are! The color makes me think of peacocks and I love them. I will give this a try and add a little color in my life!
ReplyDeleteThanks for dropping this off at the In and out of the Kitchen link party! I ca't wait to see what you come up with next week!
Cynthia at http://FeedingBIg.com
Cool idea Kathe! Can't wait to try this, thanks!
ReplyDeleteJenna
Hey Kathe,
ReplyDeleteThis came out so cute. Thanks so much for sharing with Wednesday's Adorned From Above Blog Hop.
Have a great week.
Debi and Charly
http://www.adornedfromabove.com
Clever idea! I just saw those solar lights at the dollar store and wondered if they worked. I love this crafty project.. Cindy @ sunsetcoasting.blogspot.com
ReplyDeleteJust love this...so pretty! This would be perfect to link-up to my new series - "Create It Thursday." It's live now! Click here to see
ReplyDeleteThis is so cute! I am new from southern charm! I would love for you to check out my blog and follow me back! Have a great day,Nicole
ReplyDeleteBeautiful. I might have to give this a try. I have so many canning jars!
ReplyDeleteThis is the neatest thing! I would love for you to share this at my linky party. http://hickorytrailblog.blogspot.com/2013/05/efforts-and-assets-linky-party-1.html
ReplyDeleteAngela
What a fantastic idea! So pretty and I bet it looks great at night.
ReplyDeleteKC
wow this is such a great idea!! dont you love the dollar store? I bet this shines so neat at night :) pinning as a great gift idea!
ReplyDeleteI'm sure the night view of it is as pretty as the day! Thanks for sharing at the Shady Porch. Blessings, D@TheShadyPorch
ReplyDeleteSuch a great project - thanks for sharing at Monday Funday!
ReplyDeleteSmart idea and smart way to let the sun sneak in to recharge the light. enJOYed your idea that has me brainstorming.
ReplyDeletethis is really an awesome idea! i love that you used the flat marbles to cover your jar, really nice!
ReplyDeletestopping by through fluster buster, i have a blog hop going on, come and link when you get the chance!
huggies♥
rea
Kathe, this is such a fun project!
ReplyDeleteLove this! A new Linking Party begins THIS Saturday over at Thet2women.com and we would love if you would link this up there on Sat! Thanks! Here's the link:
ReplyDeletehttp://thet2women.com/welcome-to-one-sharendipity-place/
Kathe, back to visit from TTF and let you know I appreciate you joining in each week!
ReplyDeletehugs,
Linda
So cute! I love how the sun catches the gems in the day and then they light up at night. Pretty cool :) Thanks so much for sharing with us at Weekend Wonders! And have a lovely day!
ReplyDeleteYou are such a clever clogs! :) That's so cool! Also, I’d like to know what your best blog post is & invite you to come share it with me this weekend at a Showoff Blog Party I’m co-hosting! Here’s the link: http://anyonitanibbles.blogspot.co.uk/2013/05/my-favorite-posts-weekend-blog-party.html
ReplyDeleteThis is so neat. I can't wait to get crafty with my garden. Thanks for sharing!
ReplyDeleteGenius, Kathe!! Such a great project. Thanks for sharing at A New Creation.
ReplyDeleteToo clever Kathe and so pretty. I think my flower bed could use some sparkle. Thanks for the inspiration.
ReplyDeleteHugs,
Peggy~PJH Designs
Thanks for linking up to Whimsy Wednesday! Your project has been featured this week!
ReplyDeletehttp://www.ohmy-creative.com/home/garden/garden-and-backyard-outside-inspiration/
Also, you can add your project {or any project} to my website. I feature them on my main slider on the home page...follow this link to submit your project!
http://www.ohmy-creative.com/submit-a-project/
Be sure to stop by and grab a button...
http://www.ohmy-creative.com/grab-a-button/
WOW!!! This looks like a wonderful creation.
ReplyDeleteThanks for sharing at Tuesdays with a Twist at Back to the Basics. Hope to see you again tomorrow!
http://back2basichealth.blogspot.com/search/label/Tuesdays%20with%20a%20Twist
So fun Kathe!
ReplyDeleteThanks for sharing!
Stacey of Embracing Change
What a fun way to light up the garden Kathe. Thanks for sharing it with SYC.
ReplyDeletehugs,
Jann
Great project, Kathe! We can't wait to see what you share at tomorrow's All My Bloggy Friends!
ReplyDeleteThanks for sharing your adorable diy garden art at Project Inspire{d} linky party last week!! Hope to see you at this week's party up now : http://www.settingforfour.com/2013/05/project-inspired-linky-party-no.html Pinned your post to our group linky party board! Heather
ReplyDeleteHi Kathe,
ReplyDeleteWe are featuring this post at this weeks party. Thanks so much for sharing at Adorned From Above each week. We love having you.
Debi and Charly
Kathe, Love your garden art, great idea! Thanks for sharing at Simple & Sweet Fridays.
ReplyDeleteTake Care,
Jody
This is awesome...gives me ideas for my garden...new happy follower http://lilibudsgarden.blogspot.com
ReplyDeleteWhat a wonderful idea to make a garden lantern out of jar!. Love it!
ReplyDeleteThat's terrific, Kathe! I am sure it is gorgeous all lit - love it! I do appreciate you sharing with Home and Garden Thursday,
ReplyDeleteKathy
This is such a fun idea Kathe! This will make a perfect afternoon project with the boys and I have everything I need already :) Pinned and featuring tonight!
ReplyDeleteGreat minds think alike. I just bought 5 bags this weekend. I still have to buy the glue. I was just researching what type to use. Aquarium glue!
ReplyDeleteI love this Kathe! I think I am going to try to make one for my garden. You are today's Dare to Share Feature of the Day. :)
ReplyDeletehttp://www.pamspartyandpracticaltips.com/2013/05/garden-art-light-feature-of-day.html
LOVE love LOVE this! What a simple and refreshing idea! Thanks for sharing!
ReplyDeleteI found you through Walking in High Cotton :)
This is an attractive garden art idea. I need not spend in buying garden arts anymore. Now I can make them on my own.
ReplyDeleteThe gang at My Personal Accent thinks your post about Garden Art is fantastic and we would like to invite you to party with us at starting at 5:00 Thursday nights at our new Blog Strut Peacock Style Link Party to share your creative ideas. Come on over!! http://wp.me/p2Vf55-XA
ReplyDeleteWow all these comments you surely don't need mine to tell you how clever and pretty this is. I purchased the material i need and i think this weekend this will be my project to do three......Thanks so much for sharing. Hugs! deb
ReplyDeletePS I'm sure i will share it on my blog if mine turn out good and i will be sure to give you credit and a link to your blog. I hope you'll pop over and visit me sometime too.
Hi. A while back I saw this over at Empress of Dirt- she used them for fairy message jars. I don't know which one of you came up with this first... though I think her tutorial was published before yours.
ReplyDeleteWe made them this summer and my grands enjoyed them. :D