Highs in the 70's, sunshine! Birds singing, squirrels being squirrely!
I.AM.LOVING.IT!
I have spent as much time outside as I can. Saturday night we sat out on the back patio enjoying the cool, not cold, evening.
Sitting there I remembered I needed to put out my solar lights into the garden.
I like the warm glow they send out and I have missed them. But, of course, once I dug them out of my shed, they didn't work.Now these are not expensive lights but, I didn't want to go buy all new either.
Luckily, I know how to fix them right up! And, I am going to share my tip with you! Cuz, well, we're friends and all and that's what friends do, right?
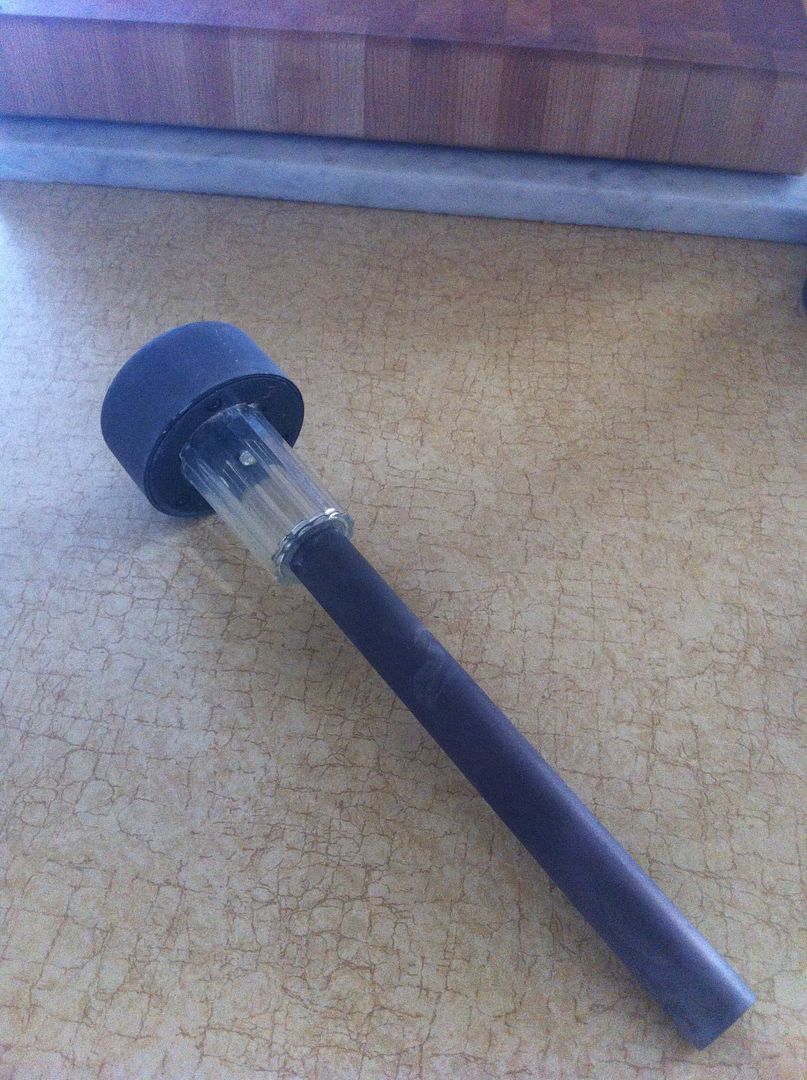
Take your light and check it out closely as some are different.
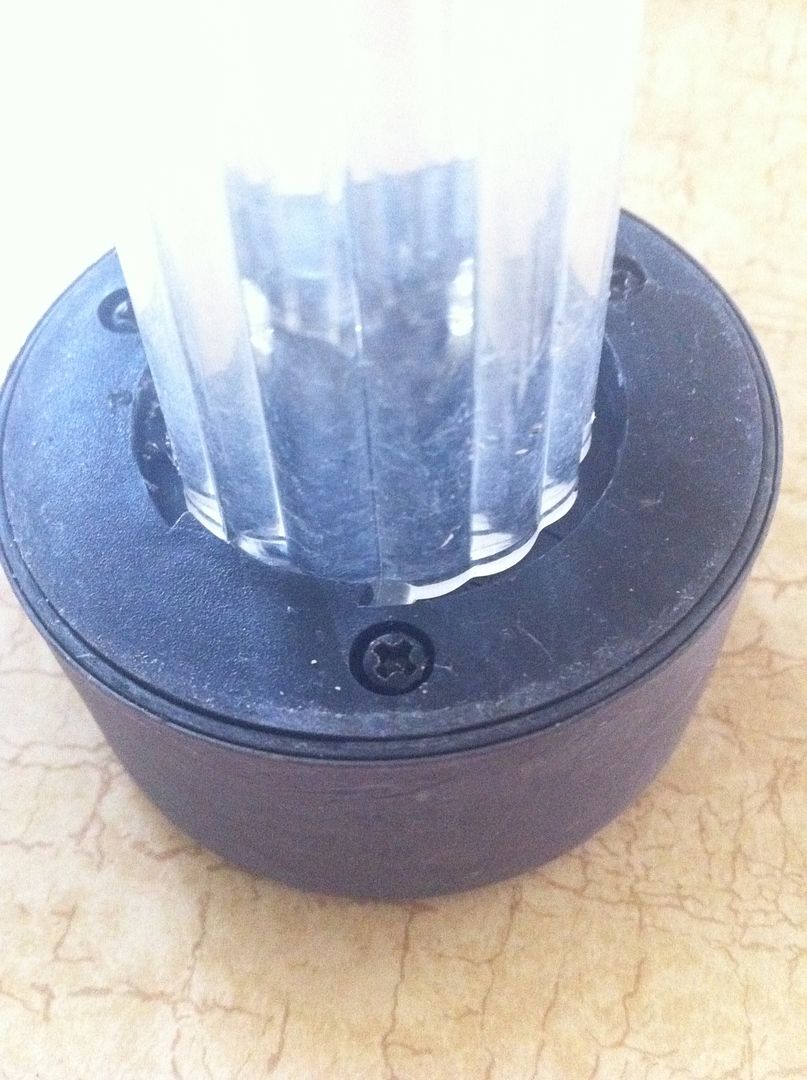
By the bulb you should see some small screws. I grabbed
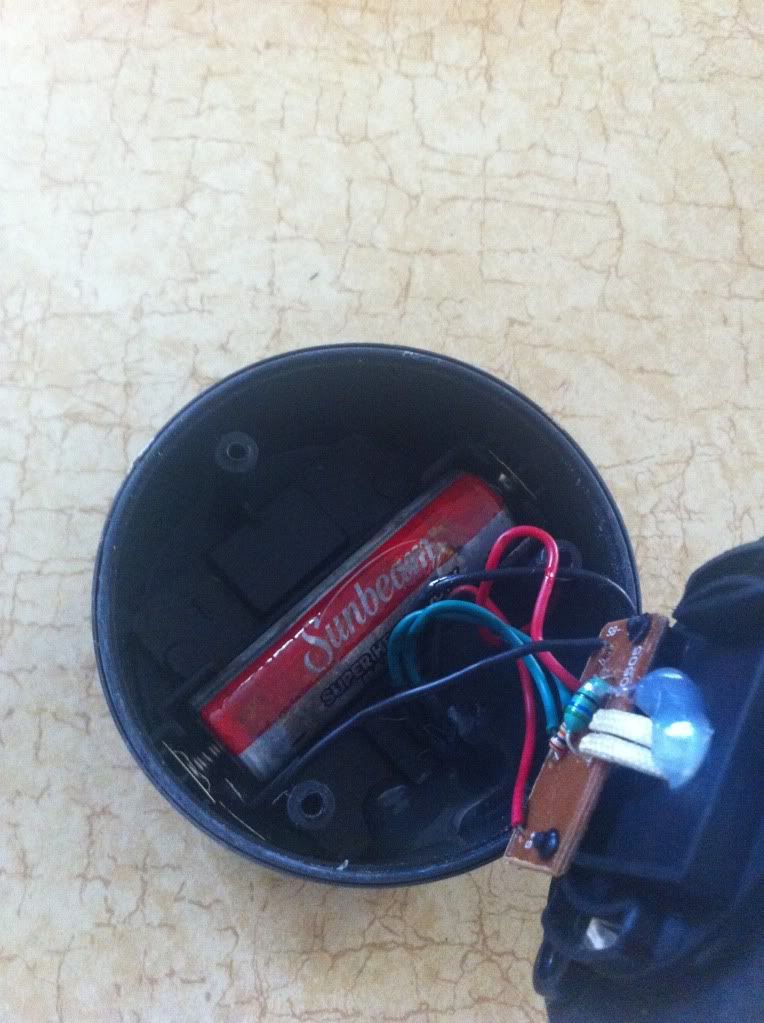
SLOWLY pull the two pieces apart. Looky there! A single AA battery! Yep, that is what gets charged by the sun during the day so that it glows at night!
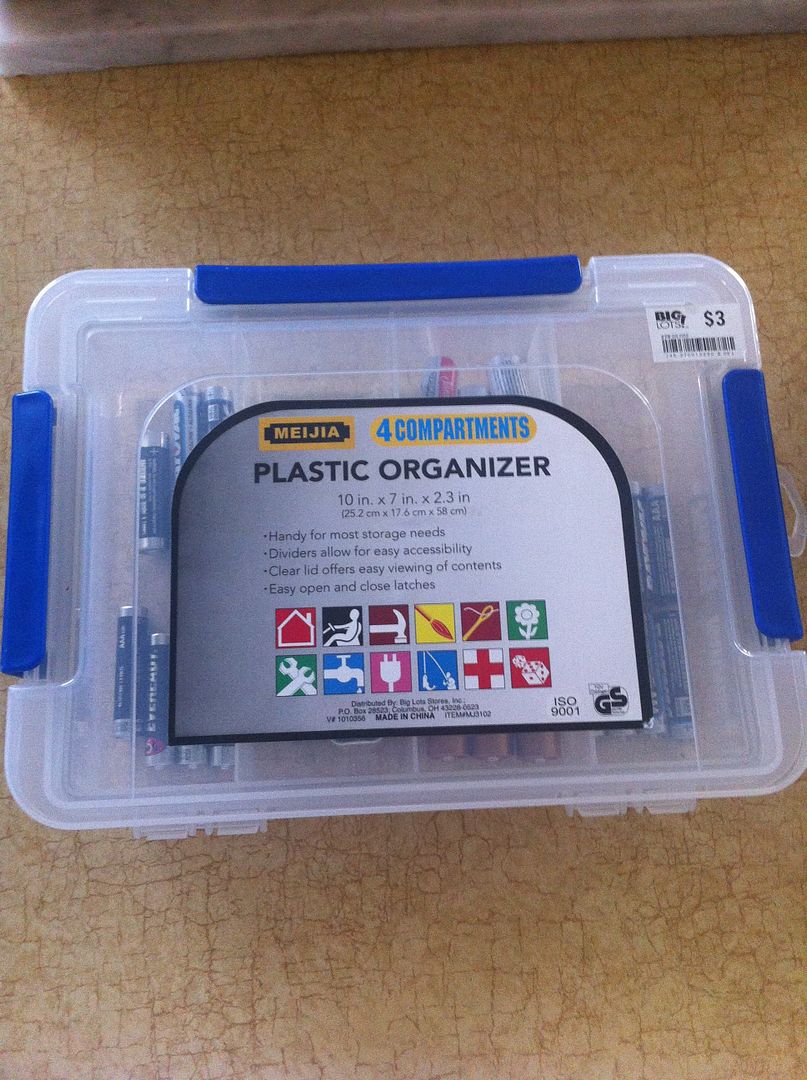
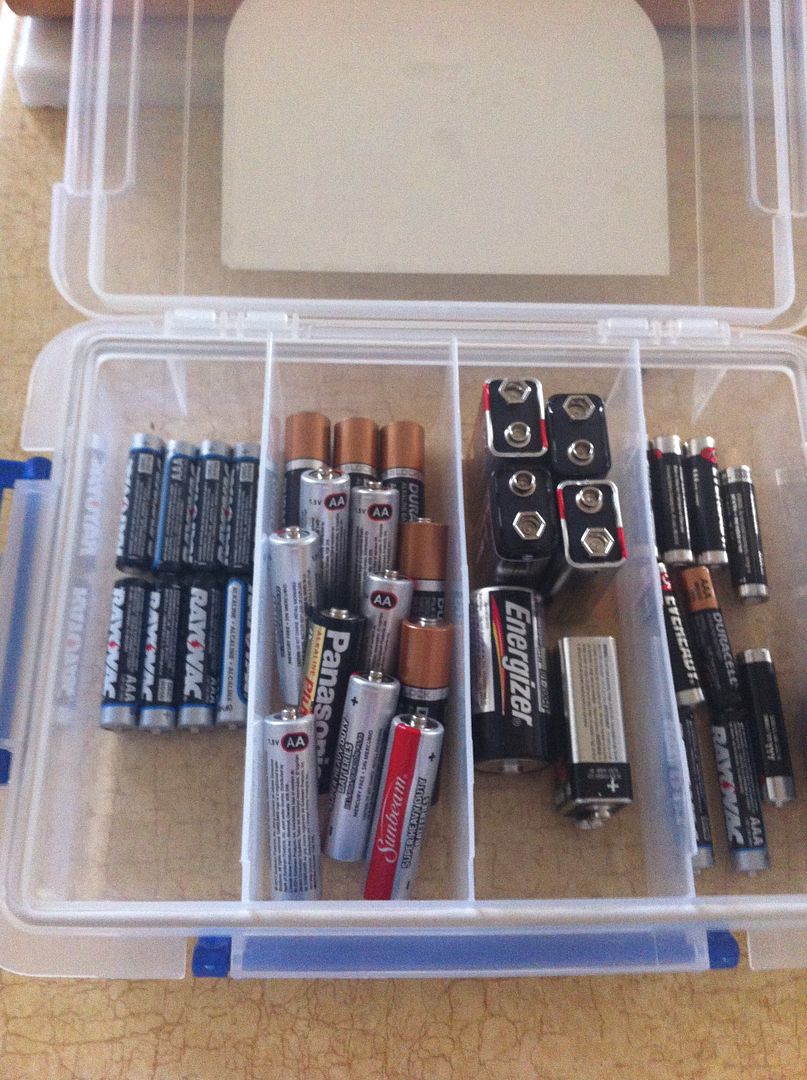
Check out our battery organizer. This is the very first Pin I ever copied. We found it at Big Lots for $3.00.
It has four compartments perfect for all of the different batteries we use. Pretty nifty eh?
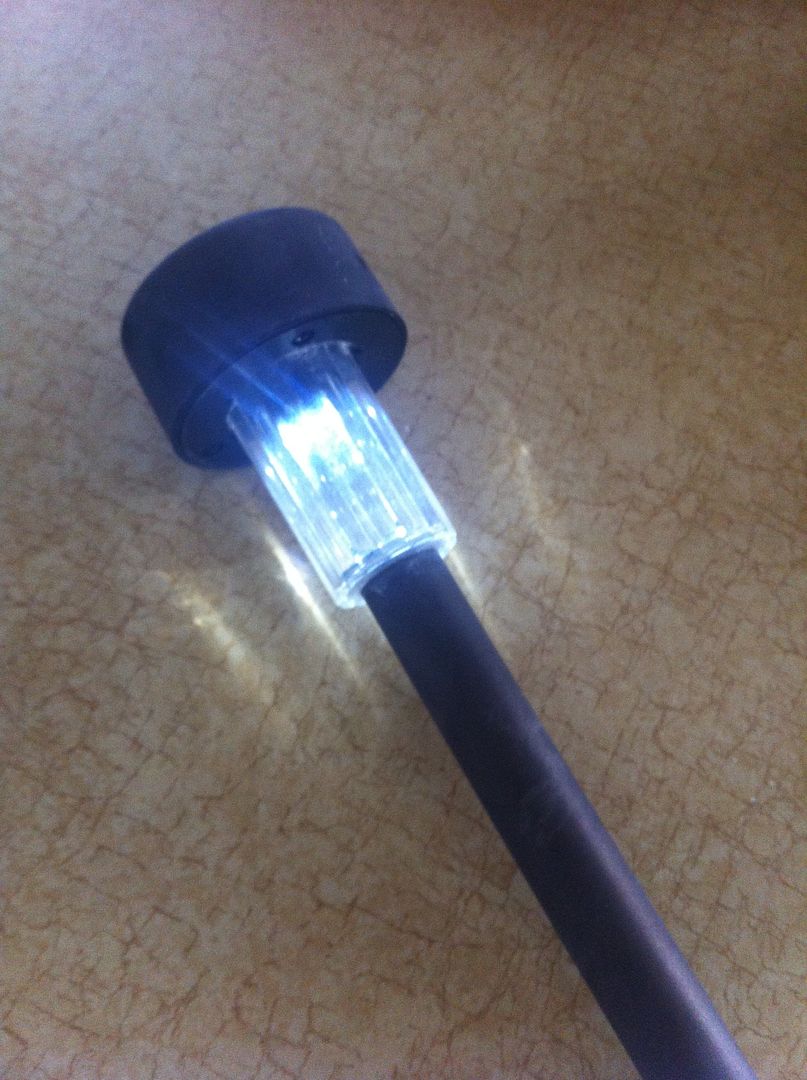
Simply replace the old battery with a new one, put your screws back in and,
let there be light!! (*edited. I have been hearing from you that if you use regular batteries, they will explode. YMMV but, I have never had one explode in all of the years I have been doing this. Also, you probably should use batteries designed for solar recharging. But, I have opened many of these to replace the battery and the manufacture of the light had put in regular everyday, cheapo batteries. I accept no responsibility for any harm to you or to your lights. I am just informing you of what works for me)
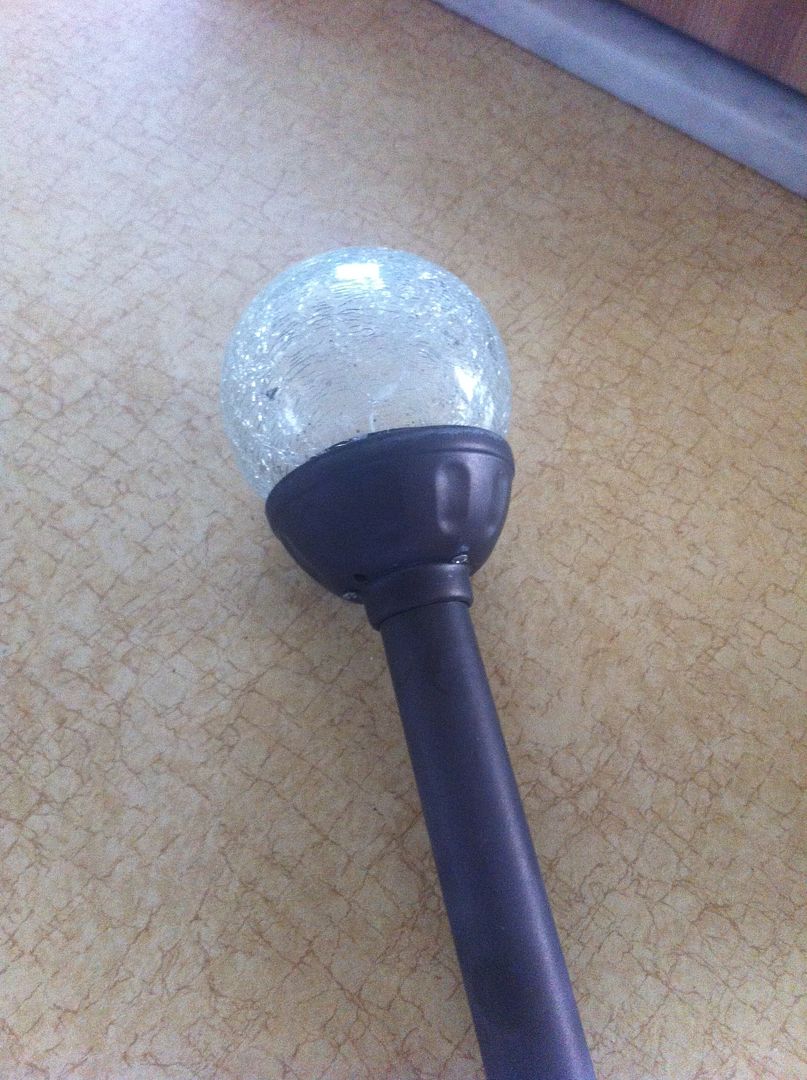
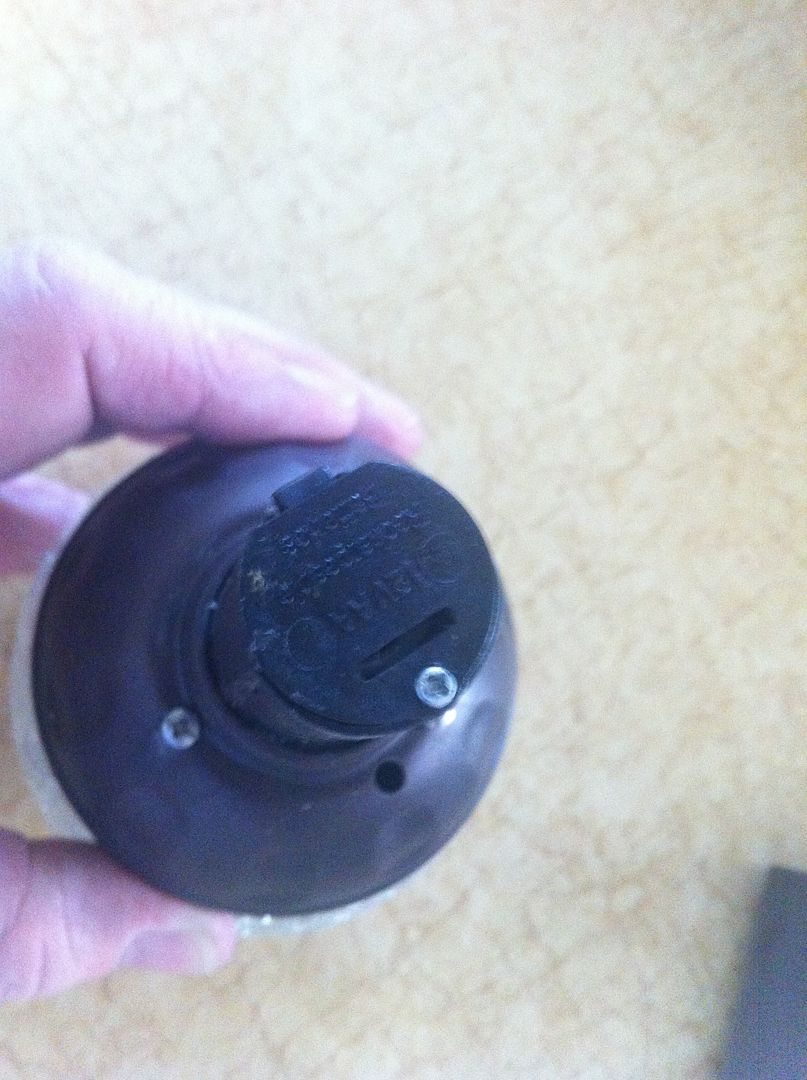
Now, if you have a different type of light, say like this one from WalMart,
with the globe on top, it gets even easier to replace the battery.
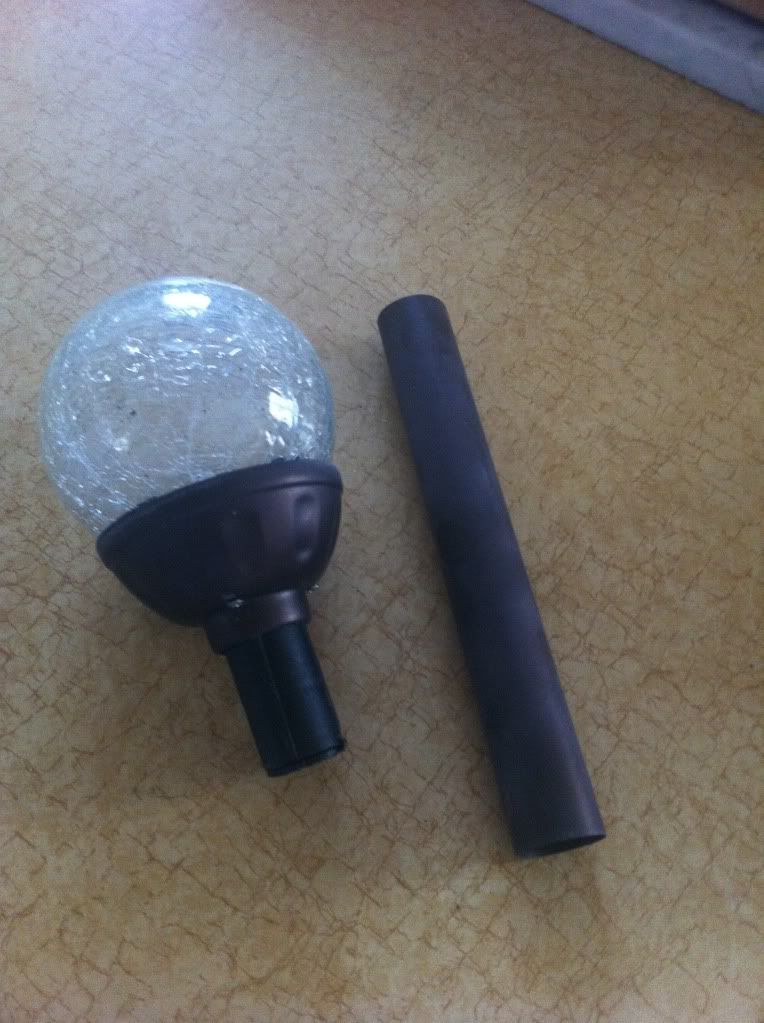
Simply pull the stake out and you will see this on the globe end
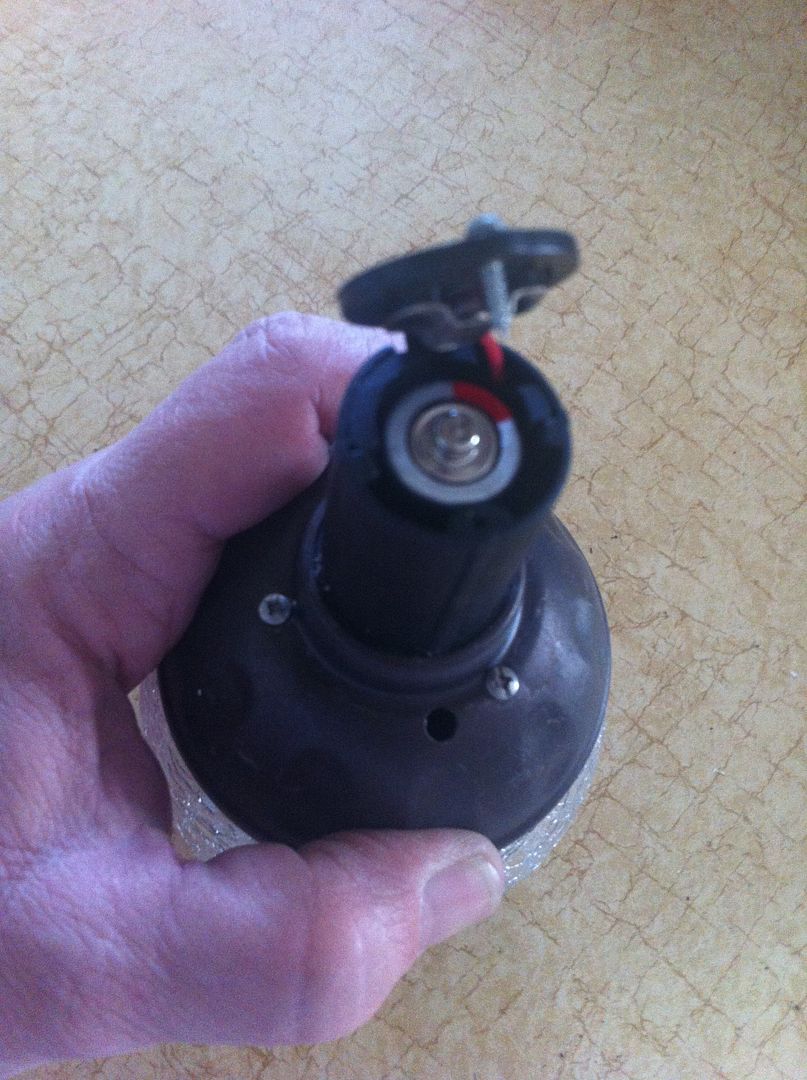
One single screw. Leave the three screws by the bulb alone.
And there is your battery. Change it out, put the screw back in and you are done! Now, you know I am always honest with you.
Two of my lights didn't make the cut. They had gotten corroded inside the battery chamber. But, I am okay with that because, I have had these lights for 4-5 years now. I can either chose to replace them or, admit I had too many in the garden anyway LOL! Now that you know the secret, are you ready to shine some light on your garden or pathways this season?
Click here to see where I may be partying this
week.
AND
Don't forget to come by on Tuesday's
Don't forget to come by on Tuesday's
for the
link party.




THANK YOU for this helpful post, Kathe! I will be unscrewing some things right away! Love that battery case too, need to go to Big Lots pronto!
ReplyDeleteThanks for the lesson! I do have some lights that have stopped glowing and I will certainly try to get them fixed! I love my "fairy lights" with that crackled glass globe.♥♫
ReplyDeleteI have been recharging and putting out solar lights all weekend! Did you use solar batteries or regular? If regular, do they recharge by the sun? Just curious, as I've only used solar batteries, which I can also quickly recharge in a battery charger.
ReplyDeleteGreat post!
I just use regular batteries.
Deleteyou need to use rechargeable batteries....alkaline batteries are not meant to be recharged and can start to leak battery acid...use solar batteries or rechargeable (ni-mh)
DeleteMy lights came with just cheapy regular batteries in them and I replaced them with the same type. I have only used cheapy, regular type batteries, not the rechargeable type and my lights will last several seasons before I have to change out the battery again. They do get recharged by the sun. They turn off by themselves when the sun comes up and come back on at sundown.
DeleteCareful using batteries that are not rechargeable. If your solar lights take a rechargeable battery, definitely use a rechargeable battery. Yes, the others will work but you will damage the light and could potentially cause more damage that could be a safety concern.
DeleteThe on at dusk off at dawn feature is common with many lights. The solar panel (be it crystalline or amorphous) will charge the battery on the inside. Then once the sensor detects darkness, they go on.
In the fall when you take the lights in and put them away for the winter consider removing the battries to help prevent some of the corrosion problems. I would also take a look in your favorite dollar store for cheap recargable battries as they are meant to be recharged without blowing up or starting to leak battery acid.
DeleteI think I only bought a couple of these so far but think I will buy more this year. Thanks for the tip!
ReplyDeleteGreat tip. Pinned!!
ReplyDeleteSuch a great tip for those lights on the fritz! Thanks for sharing with us this week at Monday Funday!
ReplyDeleteTake care,
Trish
Good to know. I don't have any of those lights, but I'm not sure I would have thought of a battery first. So happy to hear you're finally getting some spring!
ReplyDeleteI never even thought about them having batteries in them...duh! Good thing I don't have any, I probably would have thrown them away :) Awesome tips
ReplyDeleteThank you so much for that tip! I need to go check all of my lights now.
ReplyDeleteThanks for sharing this Kathe! I never knew they simply had a battery inside!
ReplyDeleteThanks for linking to a Round Tuit!
Hope you have a fabulous week!
Jill @ Creating my way to Success
http://www.jembellish.blogspot.com/
Kathe I never knew this about the lights. I just might buy some now that I know you can keep them going a lot longer then I thought!
ReplyDeletehugs,
Linda
Thanks Kathe ... never thought to look what was inside. I hope I have not thrown mine away. Great tip.
ReplyDeleteBlessings,
Audrey Z. @ Timeless Treasures
Great tip! Thanks for sharing, Kathe!!
ReplyDeleteKathe,
ReplyDeleteI had to chuckle when I read this because I just did the same thing with some of my solar lights!!
Hugs,
Deb
Look at you!! Awesome fix. We are finally getting some nice weather here too... makes you excited to get out there, doesn't it??
ReplyDeleteAwesome Post! I am going to have to try this!
ReplyDeleteKathe, thanks for the great tutorial! This post has me further pumped about spring! :D Happy day!
ReplyDeleteSo glad I read this. I never knew there was a battery in them. Such cost saving info. Thank you.
ReplyDeleteI was digging around for my solar lights and batteries all weekend! I think I will need to buy some new ones because I found a box in the shed with all tops and no bottoms:) (I wonder if the bottoms are still in the ground!)
ReplyDeleteGreat Post!! Thanks for sharing it at Plucky's Second Thought Party~ Lynn @ Turnips 2 Tangerines
What a neat tip! :)
ReplyDeleteThanks for joining the Blog Hop this week!
what a helpful post! I saw you on Our Delightful Home party! http://pleasegivepeasachance.blogspot.com
ReplyDeleteOk, I am going out to check my lights. Thanks for the tip.
ReplyDeleteNow I know why I follow you Kathe. I didn't know there was a battery inside my solar lights. Not gonna throw them away this year and buy all new, thanks to your brilliance! Blessings, Patti
ReplyDeleteThanks for the tips, Kathe! I will have to look at mine to see if I can do anything with them. I hope so because most of them have gone out!
ReplyDeleteThis is so clever. I love this idea. Thanks tons for joining Inspire Me. Hugs, Marty
ReplyDeleteI have been changing my rechargeables now for about 2 years...but I have actually had some that for some reason one of the wires becomes detatched...very simple fix to (with battery out) make sure that the ends are clean on the part that goes toward the battery, and it usually is either wrapped around a screw or if it goes to a circuit board my hubby can quickly solder it to the board where it was before (this takes a little skill) and works great!
ReplyDeleteWoot Woot! I guess I wont be RE-purchasing solar lights this year! That is brilliant! I would have never thought to look for a battery! Nice work!! Going home to pull all my lights! Thank you!
ReplyDeleteI thought those lights were disposable! Thanks for the battery tip!
ReplyDeleteOMG! Thank you so much!!! I had taken all the old ones out and bought new ones! But I have the old ones in a bag in the garage! I bet this is all they need.... now I'm gonna have TOO many in the garden! haha
ReplyDeleteGreat tip! Thank you for sharing at the Give Me The Goods Monday Link Party! http://dimplesandpigtales.blogspot.com
ReplyDeleteHello, I started following you today. I am so happy you posted this becuase I bought a cool yard art item at a yard sale and it does not light up. I am going to fit it now. Thank you again.
ReplyDeletehttp://www.atmycounter.blogspot.com
I have a couple that need to be fixed! Thanks for getting me off my bum to do it! Thank you for sharing on Fluster’s Creative Muster Party!
ReplyDeleteRobin
Fluster Buster
Yes, I need to do this because I don't want to through them away. Thanks for showing how easy it is. : )
ReplyDeleteThis comment has been removed by the author.
ReplyDeleteGetting the solar lights ready is a sure sign of sunny days ahead! Thanks so much for joining the Rock N Share party! Hope to see you again soon! Blessings, D@TheShadyPorch
ReplyDeleteThank you for this tut, Kathe--I totally have some lights that I need to do this with! I hope you enjoy the weekend!
ReplyDeleteGreat tips - and I love the battery organizer too! =) Thanks for linking up at the Pinterest Power Party!!
ReplyDeleteDanielle
SewMuchCrafting.com
Hey Kathe,
ReplyDeleteGreat tips and good tutorial.
Have a great weekend.
Debi
Will try and ck my solar lts too....when we had a Hurricane graze by us last yr we used our solar lts inside at night I put them in a vase and on our porch and we had Safe lighting to boot
ReplyDeleteWill try and ck my solar lts too....when we had a Hurricane graze by us last yr we used our solar lts inside at night I put them in a vase and on our porch and we had Safe lighting to boot
ReplyDeleteVisiting from Monday Funday. I'd like to invite you to my Friday Flash Blog, where you can share your best blog entry of the week! The party goes on ALL weekend at thejennyevolution.com. And who knows, you may just get featured next week.
ReplyDeleteJennifer
thejennyevolution.com
NO WAY! Too cool. I wish I had known this about 10 lights ago! Great tip!
ReplyDeleteHi Kathe!
ReplyDeleteThanks so much for this tip! I never knew you could do that. duh :-) So glad you linked up at Transformed Tuesday.
Hugs,
Peggy~PJH Designs
Kathe, thanks for sharing this great tip with SYC. I really like the battery organizer. Hubby stores ours in an old cigar box.
ReplyDeletehugs,
Jann
My husband and I are cursing right now!!! Just want you to know!! Every year for the past 5 years we throw away all the cheap lights that we buy from Wally World and go buy new ones!!!! I just threw 4 away a couple of weeks ago!!!!! I can't wait to try this out and am going to share it on my blog too - that is if you don't mind? I just can't believe it! I could have fixed them all!
ReplyDeleteI am a new follower of your blog! I can't wait for you to share more interesting stuffs!
ReplyDeleteCuteyPatutyCrochet
Thanks for the pin! But mine are cheapo too from Walmart for $1.............but my batteries were sunbean rechargables..............so am recharging.........and I leave mine up all year round (Charleston) and have had them in for 3 years and 2 have finally lost their beam................thanks again!
ReplyDeletePLEASE make certain you're using rechargeable Nickel-Cadmium (Ni-Cd) or Nickel Metal Hydride (NiMH) type batteries, when you replace the batteries in these lights.
ReplyDeleteAs already pointed out, Alkaline batteries are NOT designed to be recharged, and will not last, and COULD leak battery acid inside the light....pretty much ruining it.
While the battery that came out of the light LOOKS like a typical AA battery, they are definitely rechargeable batteries. Just generic (cheap) Chinese brand, is all.
I read a blog recently that rechargeables are available at wally that have more amp hours for about the same cost as the light.
ReplyDeleteIn my solar garden lights, I can only use solar batteries. If I put regular batteries in them, they just work and do not recharge. I have had them for two years. Maybe yours work now, but the battery is not being recharged. Buy solar batteries.
ReplyDeleteUse the NiCad batteries and they will recharge. Not all lights use AA but you can get what you need at any of the battery specialty stores or Radio Shack.
ReplyDeleteI have a bunch that no longer have the posts, or the clear plastic cone so I will be putting those in baby food jars as soon as my supplier finishes his creamed spinach and bananas.
Just, carefully, cut a hole in the lid the size and shape of the solar cell and glue the top of the light to the inside of the lid with silicone caulk. Then you can set them anywhere they can get sun, even float them in water (that's my plan for my garden pond).
Standard batteries, whether they're alkaline or carbon-zinc will not recharge via a single solar cell like the ones in these lights. What's happening is the current draw of a single LED is so low that a regular battery will power one for a very long time; you're just getting a lot of life out of the batteries. And hey, if it works for you, I won't tell you not to do things this way, but they aren't recharging, believe me.
ReplyDeleteRemember the shaker-style flashlights that were popular a few years ago? A lot of those were made in China very, very cheaply. They weren't actually capable of recharging -- the manufacturer just put a couple of large-ish watch batteries in them, and since they seemed to work for awhile people would buy them. When they stopped working, they would be tossed out because the initial cost was so low, and nobody really complained.
If your lights came from the store with *regular* non-rechargeable batteries in them, they may not even have a real solar cell! It could be the same thing as the shaker lights. There are no federal regulations or inspections done to prevent this sort of thing. Stuff like this is still very much buyer beware.
You are 100% correct, however, that replacing old rechargeable batteries with new will give a true solar-rechargeable light new life!
It's good to see that these are so easy to change. I have seen these in the stores didn't know if they used very expensive batteries. I was thinking like Geoff that they wouldn't charge with out rechargeable batteries.
ReplyDeleteReally just change the battery? I thought this was about fixing broken lights not how to change a battery.
ReplyDeleteThank you so much for your wondetful insite! I love the design of my solar lights and it is great that I will be able to keep them that much longer. I am pinning this!!!
ReplyDeleteWho knew? Thanks for the great tip!
ReplyDeleteKing Solarman provide 400 Watt LED and 25,000 Lumens, Solar Light Tower Tower, the Light will last 25 to 30 hours per charge, from Sun or Grid-Tie electricity. It is mobile. Silent Operation and No Emission!! All are Made in USA, in San Jose and in Fremont, CA, Please contact [email protected] 408 373 8800. Best Usage: Construction, Emergency, Military Application, Security, Crime Monitoring, Neighborhood, Special Events, Schools, Sports, Night Time Road Works, Temporary Security and others click here Light Tower
ReplyDeleteI bought 10 solar lights 2 weeks ago from Big Lots. They stopped working after a few days. I am very dissapointed. Perhaps it's because of bad batteries or the fact they weren't rechargeable in the first place like Geoff said.
ReplyDeleteI have bought pateo lights from Walmart last year and I,m forever trying to recharge them I,ve change all the batteries with new ones They say they should be charge 16 to 18 hrs So you put the switch off at night and continue charging the next day
ReplyDeleteHELLO EVERYONE --I REALLY NEED TO TELL EVERYONE!
ReplyDeleteIF YOUR SOLAR LIGHTS HAVE DEVELOPED A CHALKY SURFACE ON THE RECHARGE AREA AND PREVENTS THE SUN FROM GETTING THROUGH --YOU CAN REPAIR THE SURFACE WITH --CLEAR NAIL POLISH JUST MAKE SURE SURFACE IS CLEAN AND DRY-APPLY CLEAR NAIL POLISH---I USED TWO OR 3 COATS AND USED THE STRONGEST POLISH I HAD AVAILABLE( SCROLL DOWN)
SALLEY HANSON DIAMOND-OR ANY GOOD WATERPROOF VARNISH--CAUSE THAT WAS WHAT I HAD-- FIGURED I HAD NOTHING TO LOSE ---CHANGED BATTERY AND USED THE NAIL POLISH-
GOOD AS NEW AND SINCE I AM A SENIOR MONEY IS HARD TO FIND-- I ALWAYS TRY TO REUSE AS MUCH AS POSSIBLE!PLEASE FORGIVE THE USE OF CAPITAL LETTERS , I HAVE BAD EYESIGHT . SORRY!
HOPE THIS HELPS RENEW YOUR LIGHTS AND YOUR WONDERFUL SOLAR DISPLAY-- GRANDMA